

Essential Considerations for Home Passivation
Safety Precautions When Using Passivation Paste at Home
While home-use passivation paste is safe when used as directed, it is important to follow basic safety precautions to avoid injury or damage. Always wear rubber gloves when handling the paste-even mild citric acid-based pastes can cause skin irritation if left in contact for too long. If the paste comes into contact with your skin, rinse immediately with plenty of water. Avoid getting the paste in your eyes; if this happens, flush your eyes with water for 15-20 minutes and seek medical attention if irritation persists. Work in a well-ventilated area, especially if using a nitric acid-based paste (even low concentrations can emit mild fumes). Keep the paste away from children and pets, and store it in a cool, dry place, away from heat or open flames. Do not mix passivation paste with other cleaning products (like bleach or ammonia), as this can create harmful fumes. Finally, dispose of any unused paste or cleaning rags according to the product instructions-most pastes can be disposed of in the trash, but some may require special disposal methods.

Common Mistakes to Avoid During Home Passivation
Even with the right paste and tools, home passivation can fail if common mistakes are made. One of the most common mistakes is skipping surface preparation-contaminants like grease, dirt, or iron particles will prevent the paste from working effectively, resulting in an uneven or weak passive film. Another mistake is applying the paste too thinly or unevenly, which leads to inconsistent passivation and leaves some areas vulnerable to corrosion. Allowing the paste to dry completely on the surface is also a mistake, as this can make it difficult to remove and may leave a residue that damages the passive film. Using the wrong type of passivation paste for your stainless steel grade is another common error-for example, using a citric acid-based paste on 316 stainless steel may not be as effective as a nitric acid-based paste. Finally, rushing the process (e.g., reducing the dwell time) can prevent the paste from fully removing contaminants and forming a strong passive film. Taking the time to follow each step carefully will ensure successful passivation.
When to Repeat Passivation: Maintaining Long-Term Protection
Passivation is not a one-time process; it should be repeated periodically to maintain the stainless steel's protective passive film. The frequency of passivation depends on how the item is used and the environment it is exposed to. For indoor items like kitchen sinks or faucets (exposed to mild contaminants like soap, food, or water), passivation every 6-12 months is sufficient. For outdoor items like grills, furniture, or hardware (exposed to harsh elements like rain, saltwater, or UV rays), passivation every 3-6 months is recommended. You should also repeat passivation if you notice signs of corrosion, such as rust spots, tea staining, or pitting, or after the item has been scratched, abraded, or cleaned with abrasive tools. Additionally, if you have recently moved to a coastal area (where saltwater can accelerate corrosion) or have changed your cleaning routine (using harsher cleaners), you may need to passivate more frequently. Regular passivation will extend the lifespan of your stainless steel items and keep them looking like new for years to come.
Troubleshooting Common Issues with Home Passivation
Passivation Paste Not Working: Possible Causes and Solutions
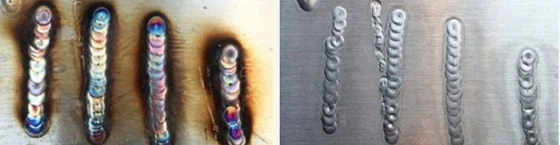
If you apply passivation paste and find that it is not working (e.g., rust spots remain, or the surface still looks stained), there are several possible causes and solutions. The most common cause is inadequate surface preparation-if the surface was not properly cleaned or dried, contaminants may still be present, preventing the paste from forming a passive film. To fix this, re-clean the surface with a mild detergent, rinse thoroughly, dry completely, and reapply the paste. Another possible cause is using the wrong type of paste for your stainless steel grade-check the product label to ensure compatibility and switch to the correct paste if needed. If the paste is expired or has been stored improperly (e.g., exposed to heat or moisture), it may be ineffective-replace the paste with a fresh container. Finally, if the dwell time was too short, the paste may not have had enough time to work-extend the dwell time to the recommended period (usually 10-30 minutes) and reapply if necessary.
Post-Passivation Stains or Residue: How to Fix Them
In some cases, you may notice stains or residue on the stainless steel surface after removing the passivation paste. This is usually caused by incomplete rinsing or allowing the paste to dry on the surface. To fix this, first, rinse the surface thoroughly with warm water, using a soft cloth or sponge to scrub any residue gently. If the residue persists, mix a solution of warm water and a small amount of mild detergent, and wipe the surface with this solution, then rinse again and dry completely. Avoid using abrasive cleaners or scouring pads, as they can scratch the passive film. For stubborn residue, you can apply a small amount of passivation paste to the affected area, let it sit for 5-10 minutes, then rinse and dry. If the stains are still present, it may be a sign that the surface was not properly cleaned before passivation-repeat the surface preparation and passivation process to ensure contaminants are removed.
Dealing with Damaged Stainless Steel: When Passivation Isn't Enough
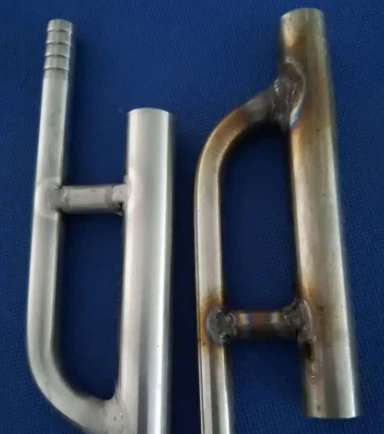
While passivation is effective for restoring damaged passive films and removing surface rust, it is not a solution for severely damaged stainless steel. If your item has deep pitting, large rust holes, or extensive corrosion that has penetrated the metal (not just the surface), passivation will not repair the damage-it will only prevent further corrosion. In such cases, you may need to repair the damage first before passivating. For small pits or scratches, you can use a stainless steel polish or abrasive pad (specifically designed for stainless steel) to smooth the surface, then clean and passivate it. For larger damage, it may be necessary to replace the item or seek professional repair services. It is important to assess the extent of the damage before passivating-if the metal is severely compromised, passivation alone will not be sufficient to protect it long-term.
Maximizing the Benefits of Home Stainless Steel Passivation
Combining Passivation Paste with Regular Maintenance
To get the most out of home passivation, it is important to combine it with regular maintenance of your stainless steel items. Regular cleaning is key-wipe down surfaces with a mild detergent and warm water at least once a week to remove dirt, grease, and other contaminants that can damage the passive film. Avoid using abrasive cleaners, steel wool, or scouring pads, as they can scratch the surface. For outdoor items, rinse them with fresh water after exposure to saltwater (like after a rainstorm near the coast) to remove salt residue. You can also apply a stainless steel protectant (compatible with passivated surfaces) after passivation to add an extra layer of protection. This protectant acts as a barrier against contaminants and moisture, extending the life of the passive film. By combining passivation paste with regular cleaning and maintenance, you can ensure your stainless steel items remain corrosion-free and look their best for years.
Cost Comparison: Home Passivation vs. Professional Services
For many homeowners, one of the biggest advantages of home passivation with paste is its cost-effectiveness compared to professional passivation services. Professional passivation can be expensive-costs typically range from $50 to $200 or more per item, depending on the size and complexity of the item. In contrast, home passivation with paste costs just a fraction of that-one tube or container of passivation paste (which can treat multiple items) costs between $10 and $30. Additionally, professional services often require you to transport your items to a facility (or pay for pickup and delivery), adding to the cost and inconvenience. Home passivation, on the other hand, can be done at your convenience, without any additional fees. For most home stainless steel items (like sinks, faucets, tools, or outdoor furniture), home passivation with paste is just as effective as professional services, making it the more affordable and practical choice.
Long-Term Benefits of Home Passivation for Stainless Steel Items
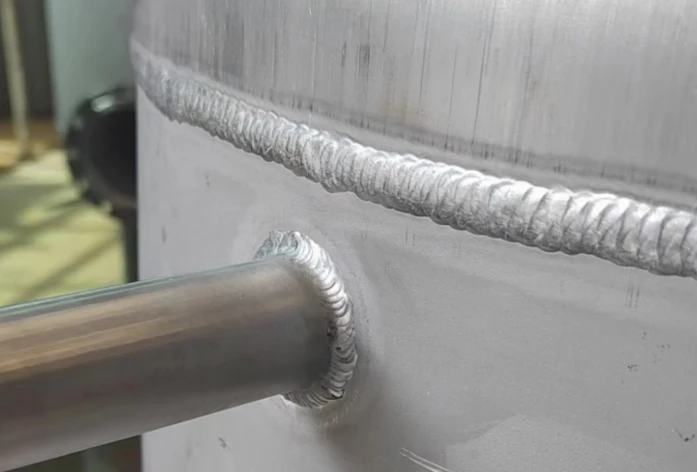
The long-term benefits of passivating stainless steel at home with paste are significant, making it a worthwhile investment for any homeowner. First and foremost, it extends the lifespan of your stainless steel items by protecting them from corrosion, rust, and staining. This means you will not have to replace items like sinks, faucets, or outdoor furniture as frequently, saving you money in the long run. Second, it maintains the aesthetic appeal of your stainless steel-passivated surfaces are shiny, smooth, and free of unsightly rust or stains, enhancing the overall look of your home (whether in the kitchen, garage, or patio). Third, it reduces the need for frequent cleaning and maintenance-passivated surfaces are easier to clean, as contaminants are less likely to adhere to the smooth, protective oxide layer. Finally, it improves the hygiene of stainless steel items used in kitchens or food preparation areas by preventing the growth of bacteria (which can thrive in rust or stain crevices). Overall, home passivation with paste is a simple, affordable way to protect your stainless steel investments and enjoy their benefits for years to come.